There’s something about antiques and timeworn furniture that adds instant charm to any room. Every once in a while, I come across a piece that already has that chippy paint look naturally just from years of everyday use, however that isn’t always the case. I found this antique dresser that although was structurally sound, needed a little TLC and would be perfect for this product I wanted to try.
why i love the chippy paint look
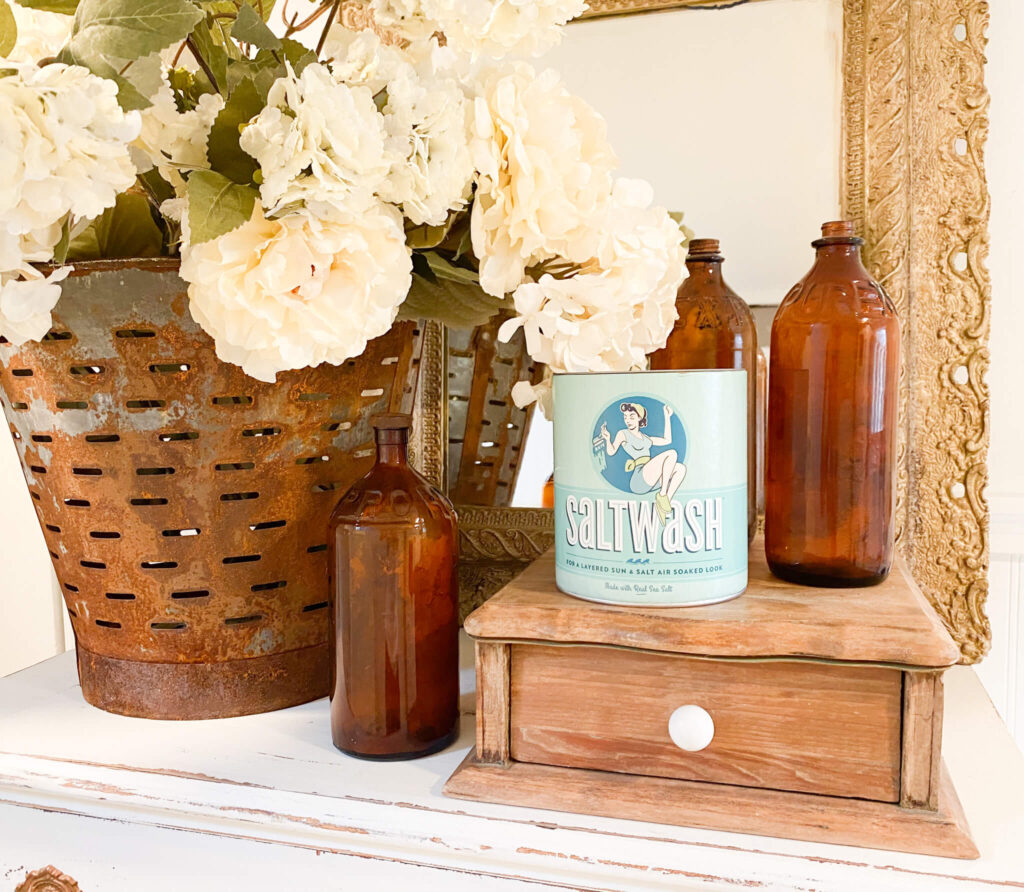
For a truly authentic chippy paint look, I usually layer on a few coats of paint and distress the surface in spots that would naturally wear over time—edges, corners, and drawer pulls. But I wanted to take it a step further. I discovered a product called Saltwash, which helps create a more textured, layered effect that mimics years of paint build-up. This little dresser was about to get a serious cottage-style makeover.
I must say—I love how it turned out! Not only did the finish look beautifully worn, but the subtle contrast between the paint layers added so much depth and character.
Please note:
This post contains affiliate links. As an Amazon Associate, I earn from qualifying purchases, which means I may get compensated/earn a commission at no extra cost to you if the affiliate links are utilized to make a purchase. For further information, see our Disclosure Policy.
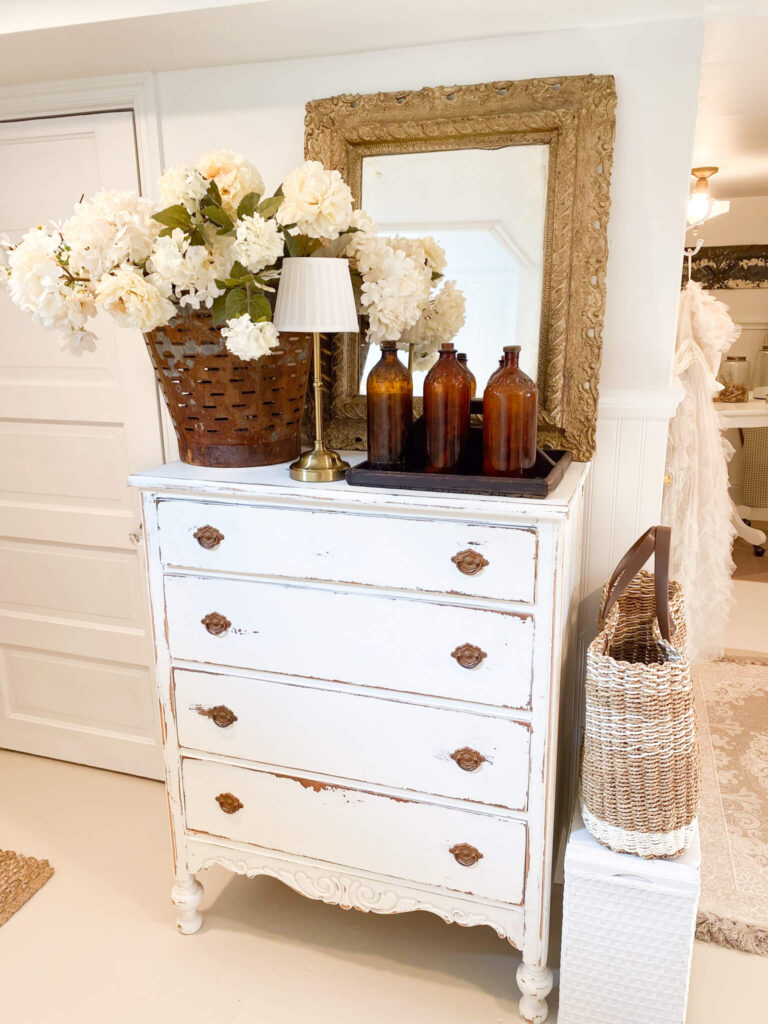
Overall, the process was fairly simple and what I found interesting was that you use two paint colors to get the distressed look. I prefer neutral colors, so I used two different white paint colors I had on hand. One which was a little darker than the other, just enough to create a layered paint effect.
Materials Needed:
- A cute wooden furniture piece
- Sandpaper (80 – 220 grit)
- Paint brush (two would be best)
- Paint (two colors)
- Drop cloth
- Damp cloth
- Saltwash product
Step-by-Step Process: how to create the chippy paint look
1. Prepare the Surface
Start by ensuring your furniture piece is clean and free from dust, dirt, or grease. If the wood has a glossy finish, lightly sand it to help the paint adhere better. Wipe away any sanding dust with a damp cloth.
2. Apply the Base Coat (Saltwash layer)
The base coat is where you’re going to mix in the Saltwash product with one of your paint colors. The can has specific details on the ratio to paint and how to apply and use their product. It’s really quite simple and they even provide a video tutorial on their website.
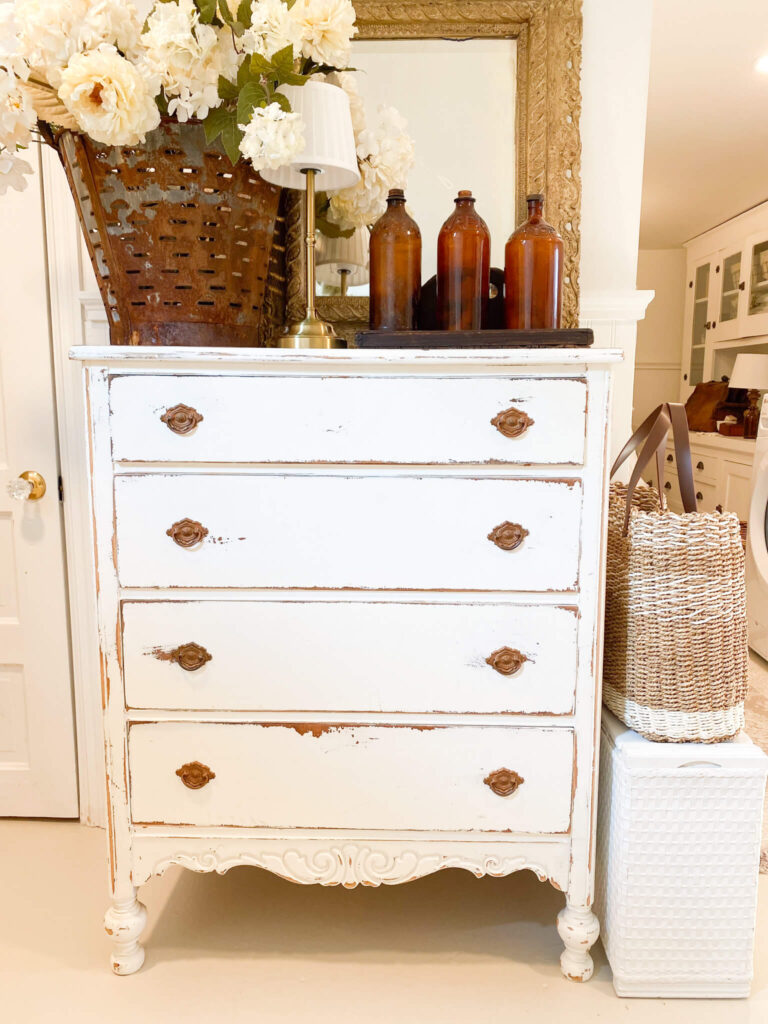
For my base coat, I used the darker color of the two paints I chose. Whatever colors you use, the base color is what would show the least. The top layer of paint is what color would be the most dominant, so choose accordingly. To get a layered chippy paint look, I recommend the darker color as the base coat.
3. Apply the Top Layer
Once the saltwashed layer is completely dry, apply the top layer of paint which would be the lighter color of paint. No Saltwash will be used for the top layer. I applied only one coat of the top layer, but two coats will work as well.
4. Distress to impress
Once the paint is completely dry, simply give it a light sanding. Gently sand the areas that would naturally wear—edges, corners, handles. This step reveals that beautiful underlayer and completes the chippy paint look.
Final Thoughts: worth the extra step
I had never tried using two paint colors to achieve the chippy paint look and this process is one more step or product to use, but in my opinion using the Saltwash gives it a more authentic chippy look than simply painting and sanding. It was a fun and easy process and I highly recommend you try it next time you’re looking for a fun paint project.